Asparagus is an exquisite and very healthy delicacy vegetable that is valued for its tender young shoots with a subtle nutty flavor. Growing asparagus is a slow process that requires patience, but the result is worth it. A greenhouse allows you to create optimal conditions for this crop, get an earlier harvest, and even organize the forcing of shoots in the winter-spring period. In this article, we will examine in detail all the nuances of growing asparagus in greenhouse conditions.
Benefits of Growing Asparagus in a Greenhouse
Growing asparagus in protected soil offers vegetable growers a number of significant advantages:
- Accelerated receipt of the first harvest: In the greenhouse young plants develop faster, which can somewhat shorten the waiting period for the first full harvest (usually asparagus begins to be harvested in the 3rd year after planting).
- Earlier Seasonal Harvest: Greenhouse conditions allow young shoots to be harvested 2-4 weeks earlier than in open ground.
- Extending the harvest period: It is possible to extend the harvest season, especially if the greenhouse is heated.
- Possibility of forcing: In heated greenhouses, asparagus can be forced from rhizomes in winter or early spring, producing fresh shoots outside the traditional season.
- Protection from adverse weather conditions: Plants are protected from recurrent frosts, strong winds, hail and excessive precipitation, which can damage tender shoots and weaken plants.
- Microclimate control: It is easier to maintain optimal temperature, soil and air humidity in a greenhouse, which has a positive effect on the growth and quality of shoots.
- Reduced Risk of Some Diseases and Pests: Although there is no complete protection, the isolated space of a greenhouse can limit the spread of some pathogens.
- Better quality shoots: When properly cared for, greenhouse asparagus often turns out more tender, juicier and cleaner.
Choosing a variety of asparagus for a greenhouse

Both male and female hybrids are suitable for greenhouse cultivation, but male F1 hybrids are often preferable, as they do not waste energy on seed formation and produce more shoots.
Criteria for choosing a variety:
- Early maturity: Early and mid-early varieties will allow you to harvest faster.
- Yield: High yielding hybrids will provide a larger harvest of shoots.
- Quality of shoots: Thickness, tenderness, absence of bitterness, color (green, white or purple).
- Disease resistance: Especially to fusarium and rust.
- Adaptation to regional conditions: Although the greenhouse microclimate is controlled, the overall stability of the variety is important.
Popular and recommended varieties of asparagus:
- Green asparagus:
- 'Mary Washington': An old, time-tested American variety. Mid-early, productive. Shoots are green, with a purple tint at the top, good taste. Relatively resistant to rust.
- 'Argenteuil': A French variety, popular for both green and bleached asparagus. Early maturing, shoots are thick, tender, with a pinkish tip.
- 'Connover's Colossal': An old English variety with large, green shoots.
- F1 hybrids (often male):
- 'Gijnlim' (Gijnlim F1): Very early, high-yielding Dutch hybrid. Shoots are green, smooth, excellent quality. Suitable for obtaining green and white asparagus.
- 'Backlim' (Backlim F1): Late-ripening hybrid, produces thick, high-quality green shoots. Good for extending the season.
- 'Xenolim' (Xenolim F1): Early male hybrid, forms green shoots.
- 'Franklin F1': Early hybrid, green shoots of good quality.
- White asparagus (etiolated): Produced by hilling shoots of the same varieties as green, or by growing special varieties in the dark.
- Purple Asparagus:
- 'Violet Passion' (Viola): The shoots are purple (turn green when cooked), sweeter and more tender than green varieties, with less fiber. Contains anthocyanins.
Where to buy planting material?
It is best to buy one- or two-year-old seedlings (rhizomes, “crowns”) from specialized nurseries or reliable suppliers. You can also grow asparagus from seeds, but it will take longer until the first harvest.
Preparing the greenhouse and soil

Asparagus is a perennial plant that will grow in one place for 15-20 years or more, so soil preparation must be approached very responsibly.
When to start preparing?
In the fall, preceding spring planting, or at least 1-2 months before planting.
Soil requirements for asparagus:
- Soil type: Asparagus prefers light, loose, well-drained, organically rich sandy loam or light loamy soils. Heavy clay soils should be improved by adding sand, compost and peat.
- Acidity (pH): Optimum pH level is 6.0-7.0 (neutral or slightly acidic). Asparagus grows poorly on acidic soils. If necessary, the soil is limed with dolomite flour or lime.
- Groundwater level: Not closer than 1-1.5 m from the surface. Asparagus does not tolerate stagnant water.
- Lighting: Asparagus loves light, so the greenhouse should be well lit.
- Predecessors: The best predecessors are legumes, cucumbers, tomatoes, onions. Asparagus should not be planted after asparagus itself or other crops that have common diseases.
Stages of soil preparation in a greenhouse:
- Cleaning the greenhouse: Remove all plant debris, weeds. Disinfect the greenhouse structures.
- Deep digging of the soil: To a depth of at least 40-60 cm, since the root system of asparagus is powerful and goes deep. When digging, carefully remove the roots of perennial weeds.
- Adding organic fertilizers: Asparagus is very responsive to organic matter. Add a large amount of well-rotted manure (10-15 kg/m²), compost (15-20 kg/m²) or vermicompost.
- Application of mineral fertilizers (per 1 m²):
- Superphosphate: 60-80 g
- Potassium sulfate or potassium salt: 30-40 g
- Nitrogen fertilizers (for example, ammonium nitrate - 20-30 g) are best applied in the spring before planting or as top dressing.
- Formation of planting trenches or ridges:
- Trench method (preferred): Dig trenches 30-40 cm deep and 30-40 cm wide. Place a layer of rotted manure or compost (15-20 cm) at the bottom of the trench, then a layer of fertile soil (10-15 cm) mixed with mineral fertilizers.
- Ridge method: Form high ridges (25-30 cm) with well-fertilized soil.
- Distance:
- Between rows (trenches): 80-120 cm.
- Between plants in a row: 30-50 cm.
Optimal greenhouse conditions for asparagus:
- Temperature:
- Seed germination: +20-25°C.
- Growth and development: Optimum daytime temperature +18-24°C, nighttime +12-15°C. Asparagus can withstand short-term temperature drops, but requires warmth for active shoot growth.
- Lighting: Full daylight. If there is insufficient light, the shoots stretch out and become thin.
- Ventilation: Regular ventilation is necessary to prevent overheating and reduce humidity, which is important for the prevention of fungal diseases.
Planting asparagus in a greenhouse

Asparagus is propagated by seeds and vegetatively (by dividing the rhizomes). To obtain a faster harvest, planting by rhizomes (seedlings) is usually used.
- Growing asparagus from seeds (to get your own seedlings):
- Sowing dates: February-March (in a greenhouse in seedling boxes) or April-May (in open ground in a seedling bed).
- Seed preparation: Asparagus seeds have a dense shell and are difficult to germinate. They are soaked in warm water (+25-30°C) for 2-3 days, changing the water 2 times a day. A growth stimulator can be added. Then the seeds are germinated in a damp cloth until they hatch.
- Sowing: Sow in boxes or pots with loose nutrient substrate to a depth of 1.5-2 cm.
- Seedling care: Maintain a temperature of +20-25°C, water regularly, provide good lighting. After 2-3 true leaves (needles) appear, the seedlings are pricked out or thinned out.
- Planting in a permanent place: Seedlings are planted in a permanent place in a greenhouse the following spring (as annual seedlings) or in the fall.
- Planting with rhizomes (seedlings, “crowns”):
This is the most common and fastest method. One-year or two-year seedlings are used.
- Planting time: Early spring (March-April, as soon as the soil allows) or autumn (September-October, 3-4 weeks before frost). Spring planting is preferable.
- Preparing the seedlings: Inspect the rhizomes. They should be healthy, elastic, with well-developed buds (at least 3-5) and fleshy roots. Dried roots can be soaked in water for several hours. Long roots can be shortened a little. Treat the rhizomes in a fungicide solution for prevention.
- Trench planting technique:
- At the bottom of the prepared trench (with a nutrient cushion), mounds of fertile soil are made at a distance of 30-50 cm from each other.
- The asparagus rhizome is placed on top of the mound, carefully spreading the roots along the slopes of the mound in all directions. The buds should be directed upwards.
- Cover the rhizomes with fertile soil so that the apical buds are 5-7 cm below the soil level.
- Water generously.
- Mulch the soil with peat or compost.
- Planting technique on ridges: Similar, but the rhizomes are placed in holes on the ridge of the ridge.
Important: In the first year after planting, asparagus is not allowed to bear fruit so that the plant can take root well and gain strength. All emerging thin shoots are left for the development of the bush.
Caring for asparagus in a greenhouse

Caring for asparagus in the first years is aimed at forming a strong root system.
- Watering:
- Asparagus requires regular but moderate watering, especially in the first year after planting and during dry periods.
- The soil should be moist to the depth of the roots.
- Avoid both drying out and stagnant water.
- Water at the roots using warm water.
- Top dressing:
Asparagus is very responsive to fertilizers.
- First year:
- 2-3 weeks after planting, fertilize with a solution of nitrogen fertilizer (for example, ammonium nitrate 15-20 g/10 l of water) or mullein infusion (1:10).
- In mid-summer – with complex mineral fertilizer (nitroammophoska 30-40 g/m²).
- Second and subsequent years:
- Early spring (before shoots begin to grow): Complete mineral fertilizer with a predominance of nitrogen (for example, urea or ammonium nitrate 20-30 g/m²).
- After harvesting: Complete mineral fertilizer (superphosphate 40-50 g/m², potassium sulfate 20-30 g/m², ammonium nitrate 15-20 g/m²). This is the most important fertilizer for laying the foundation for next year's harvest.
- In autumn (after yellowing and pruning of stems): Phosphorus-potassium fertilizers (superphosphate 30-40 g/m², potassium salt 20-30 g/m²) and organic (rotted manure or compost 3-5 kg/m² under mulching).
- Reacts well to fertilizing with mullein or bird droppings infusion during the growing season.
- Loosening and weeding:
- Regularly loosen the soil between rows and around plants, especially after watering, to improve aeration and control weeds.
- Weed asparagus competes with the plants for nutrients and moisture. Be careful not to damage the shallow roots and buds of the asparagus.
- Mulching the soil with peat, compost or straw helps retain moisture, suppress weed growth and improve soil structure.
- Formation of the bush and care of plantings:
- First year: Allow all shoots to grow freely to develop a strong root system.
- Second year: You can cut off a few of the thickest shoots (no more than 1-2 per bush) for testing, but the main harvest has not yet been collected.
- In autumn (annually): When the asparagus stalks turn yellow and dry out (usually in October-November), they are cut at ground level or leaving 2-5 cm stumps. The cut stalks are removed from the greenhouse and burned to prevent the spread of diseases and pests.
- Hilling (for white asparagus): In spring, when shoots begin to appear, they are hilled with soil or covered with an opaque material (black film, special caps, boxes). The height of the ridge is 20-30 cm. The shoots are cut when their tops appear on the surface of the ridge.
- Maintaining the microclimate:
- Temperature: Maintain an optimal temperature regime. Ventilate the greenhouse on hot days.
- Ventilation: Ensure good air circulation.
Asparagus harvest (starting from the 3rd year)
When to start collecting?
- The first full harvest begins in the third year after planting the rhizomes (or in the fourth year when grown from seeds).
- Harvesting begins in the spring, when the young shoots reach a height of 15-20 cm and a thickness of at least 1 cm. The heads of the shoots should be dense, not opened.
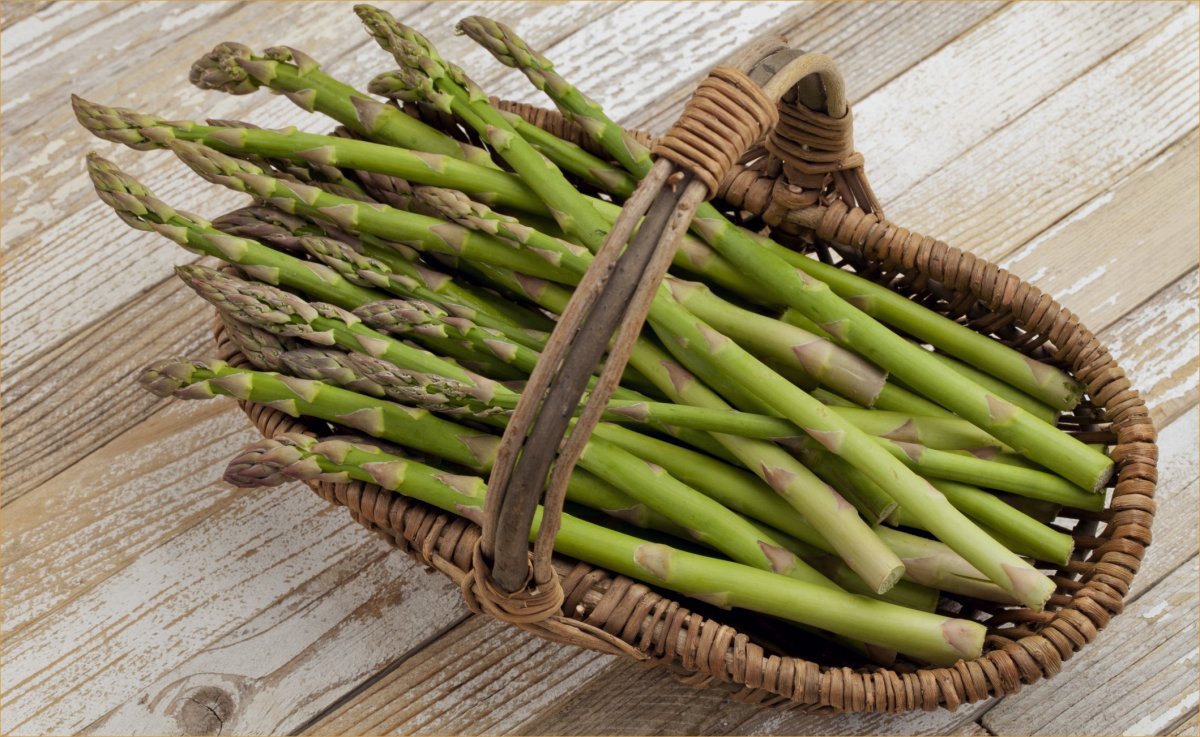
How to harvest asparagus?
- Green asparagus: The shoots are cut with a sharp knife at the very surface of the soil or 1-2 cm below the soil level.
- White asparagus: Carefully dig up the ridge of earth and cut off the shoot at its base, at a depth of 15-20 cm. Then restore the ridge.
- The collection is carried out in the morning, when the shoots are most juicy.
- You can't cut all the shoots off a bush at once. Always leave a few strong shoots for further plant development and photosynthesis.
Collection duration:
- Third year: The harvest does not last long, 2-3 weeks. No more than 3-5 shoots are cut from each bush.
- Fourth and subsequent years: The collection period is gradually increased to 6-8 weeks (usually from late April/early May to late June/early July).
- Important: Do not exhaust the plants by excessive harvesting. If the shoots become thin (less than 0.5-0.7 cm in diameter), stop harvesting so that the plant can accumulate strength for the next season.
After the collection is complete:
- Allow the remaining shoots to grow into strong green stems.
- Apply generous top dressing with complete mineral fertilizer.
- Continue care (watering, weeding, loosening).
Forcing asparagus in a greenhouse in winter
In a heated greenhouse, you can get a harvest of asparagus in winter or early spring using the forcing method.
- Preparation of rhizomes: Use 3-4 year old powerful rhizomes, dug up in autumn before frosts. They are stored at a temperature of +1-2°C (for example, in a basement, dug in sand).
- Dormant period: Rhizomes require a dormant period of at least 2 months.
- Planting for forcing: In December-February, the rhizomes are planted in a greenhouse in boxes, containers or on shelves with nutritious soil (a mixture of peat, humus, garden soil). The rhizomes are placed close to each other and covered with soil so that the tops of the buds are covered by 2-3 cm (for green asparagus) or 15-20 cm (for white asparagus, or use a shelter).
- Conditions for forcing:
- Soil temperature: +18-20°C.
- Air temperature: +15-18°C.
- Watering: Regular, with warm water.
- Lighting: For green asparagus – moderate, for white – not required (darkness).
- Harvesting: Shoots begin to appear after 2-3 weeks. Harvesting lasts 4-6 weeks.
- After forcing: The rhizomes are usually very depleted and are not used for further cultivation.
Control of asparagus diseases and pests
- Asparagus fly (Platyparea poeciloptera): The larvae damage young shoots, causing them to become twisted and wither.
- Control measures: Collection and destruction of damaged shoots. Soil loosening. Application of insecticides during the fly's flight period (May-June).
- Asparagus leaf beetle (Crioceris asparagi) and twelve-spotted leaf beetle (Crioceris duodecimpunctata): Beetles and larvae eat leaves (needles) and young shoots.
- Control measures: Manual collection of beetles and larvae. Spraying with insecticides (Aktara, Fitoverm).
- Asparagus rust (Puccinia asparagi): A fungal disease that appears as rusty-brown pads on stems and leaves in the second half of summer.
- Control measures: Selection of resistant varieties. Cutting and burning of affected stems in autumn. Providing good ventilation. Treatment with fungicides (Bordeaux mixture, Topaz).
- Fusarium wilt and root rot (Fusarium spp.): Affects the root system and base of stems. Plants turn yellow, wilt and die.
- Control measures: Crop rotation (do not plant asparagus in one place longer than the prescribed period without a break). Use healthy planting material. Good soil drainage. Avoid over-watering. Treat rhizomes before planting.
- Slugs: May damage young shoots.
- Control measures: Manual collection, use of traps.
Preventive measures:
- Using healthy planting material from reliable suppliers.
- Compliance with agricultural technology (correct soil preparation, balanced fertilizing, optimal watering).
- Ensuring good ventilation in the greenhouse.
- Timely removal and destruction of plant debris and weeds.
- Autumn pruning and burning of fruiting stems.
Potential problems when growing asparagus and their solutions

- Thin, weak shoots:
- Reasons: Young age of plants, lack of nutrition, dense plantings, excessive harvesting in previous years, lack of light, diseases.
- Solution: Proper care, regular feeding, collection rationing, providing sufficient lighting, and disease control.
- Bitter shoots:
- Reasons: Too old, overgrown shoots. Lack of moisture.
- Solution: Timely collection of young shoots. Regular watering.
- Plants grow poorly and turn yellow:
- Causes: Inappropriate soil acidity, poor drainage, lack of nutrients, diseases (fusarium), root damage.
- Solution: Check and adjust soil pH, improve drainage, fertilize, diagnose and treat diseases.
Growing asparagus in a greenhouse with your own hands
Growing asparagus in a greenhouse is an investment of time and effort that will pay off handsomely in the form of tasty and healthy delicacy shoots. By creating optimal conditions and providing the plants with proper care, you will be able to enjoy the harvest of this wonderful crop for many years. Patience, attention to detail and adherence to agricultural rules are the keys to success in growing greenhouse asparagus.